


How to Prep Wheels So Stickers Never Fall Off
Wheel sticker installation stays put when you prep the surface right, clean first, de oil second, then apply warm and press the edge hard. I learned this the annoying way after a fresh hubcap sticker lifted at one corner and took a one way trip down the highway. The sticker was not “bad,” the cap was not “wrong,” my prep was lazy. I wiped it once, stuck it on, and hoped wind and water would be nice to me.
Wheels are a rough place for any adhesive, because they live in heat, grit, and chemicals. Brake dust is tiny metal mixed with road film, and it bakes into the plastic ring around your cap. Tire shine is an oily shield, and that oil creeps onto the exact area you want to bond. Wheel cleaners can leave residue too if you spray, scrub, rinse fast, and call it done.
Most “it peeled for no reason” stories have one of three causes, oil left on the surface, an edge landing on a bevel or texture, or a cold cap at install time. Fix those causes and wheel decals stop acting like a gamble. This is not about buying extra products, it is about doing the steps in the right order. That is what you are about to do.
What makes wheel stickers fail, in plain English
The fastest way to get a long lasting install is to name the stuff that breaks it. When you know what you are fighting, you stop trying random cleaners and you stop blaming the sticker. You also stop repeating the same mistake, because you can spot it before you peel the backing. Keep this list in your head while you work, and the job stays calm.
Silicone and oils from tire dressing, wax, polish, and fingerprints
Brake dust and grit hiding in the outer ring and tiny grooves
Water trapped in seams that creeps out during install
Cold plastic that makes the adhesive stiff and weak at the edge
A sticker that bridges a bevel, curve, or heavy texture
The short tool list that makes this easy
You do not need a full detailing setup, but you do need clean tools. The one rule that saves installs is simple, keep your decal towels away from wax and dressing towels. If you mix them, you wipe oils right back onto the cap and you undo your own work. Set the tools out first so you do not hunt for things with sticky hands.
Car wash soap and clean water
Soft brush or old toothbrush for grooves
Two clean microfiber towels reserved for stickers
Isopropyl alcohol for the final wipe
Painter tape for hinge alignment
Plastic card wrapped in microfiber for pressing
Hair dryer or heat gun on low for warming
If you can remove the center cap, do it, because bench work makes everything easier. You can clean the edge ring properly without dripping cleaner down the wheel, and you can press evenly without bending your wrist. If it is a full wheel cover, pull it off and do the same thing on a towel. This one choice makes the rest of the steps feel simple.
Step one: make sure the sticker fits the flat face
This is the part most people skip, then they blame the adhesive. If your sticker hangs onto a bevel, it lifts sooner because the edge has less contact area and more airflow. Your goal is simple, the sticker sits fully on the flat circle where the logo lives. Once the size is right, the rest of this post becomes almost boring.
If you are not sure what to measure, use How to Measure Wheel Center Caps Correctly. Measure the flat face in millimeters, not the whole cap, and write the number down. Do not measure the wheel opening, measure the cap face where the sticker will sit. The goal is always the same, keep the sticker edge on the flat area.
Step two: wash first, because alcohol is not a dirt remover
Soap and water come first every single time, because alcohol is for oils, not for grit. Wiping grit around is how you grind contamination into plastic and scratch glossy caps. The wash step is also where you find the hidden dirt ring that lives right at the sticker edge. Use this exact order so you do not miss the edge ring and so you do not overthink it.
Rinse the cap or wheel area to knock off loose grit
Wash the cap face and the edge ring with soapy water
Use a brush to clean the groove around the face
Rinse until the water runs clear
Dry, wait a minute, then dry again
That second dry matters because water hides in seams and creeps out during alignment. If you live somewhere cold, warm dry the cap for a minute with a hair dryer, because you want it dry all the way through. Do not move on until the cap feels dry, not cool and damp. Dry plastic is friendly plastic.
Step three: strip oils with alcohol, then stop touching the face
Now you remove the invisible film that kills adhesion, tire dressing mist, wax haze, finger oils, and cleaner residue. Adhesive does not bite through that film, it bonds to the film, and the film lets go. This is why a cap can look spotless and still fail at the edge. The final wipe is the step that turns “looks clean” into “actually bonds.”
3M’s substrate prep guidance for graphics includes isopropyl alcohol cleaning as a standard step after general cleaning, because it removes residues soap leaves behind. Spray alcohol onto the towel, not directly onto the cap, so you do not flood seams and trap liquid at the edge. Wipe in one direction, flip to a clean side, wipe again, then let it flash dry fully. After this wipe, do not touch the face with bare fingers, and if you do, wipe again.
Step four: apply warm, because cold adhesive is weak adhesive
If the cap feels cold, the install looks fine at first and then the edge lifts later. That is cold plastic and stiff adhesive that never flowed into the surface. Film makers commonly specify application windows around 10°C to 32°C and recommend heating the substrate when it is colder, because warm surfaces make the adhesive settle correctly. Warm the cap until it feels warm to the touch, not hot, and keep the heat moving so you do not cook one spot.
Once the cap is warm, plan your placement so you are not chasing alignment while the adhesive is already grabbing. A warm surface makes the sticker grab faster, which is good, but it also means you need control. That control comes from the hinge method, not from trying to freehand a perfect circle. Set yourself up so the sticker lands right on the first try.
Step five: use a tape hinge so alignment is controlled
This is where installs either look factory or look crooked forever. When people peel the backing and try to float the sticker, it grabs, they panic, and now the edge gets touched and stretched. The tape hinge method fixes that, because the sticker stays located while you remove the backing. Use the hinge method below because it is repeatable and it keeps the circle centered.
Place the sticker on the cap with the backing still on
Center it by eye, then put painter tape across the top as a hinge
Flip the sticker up on the hinge, then peel the backing
Hold the sticker by the edges, then swing it down using the hinge
Lay it down from the center outward, slow and steady
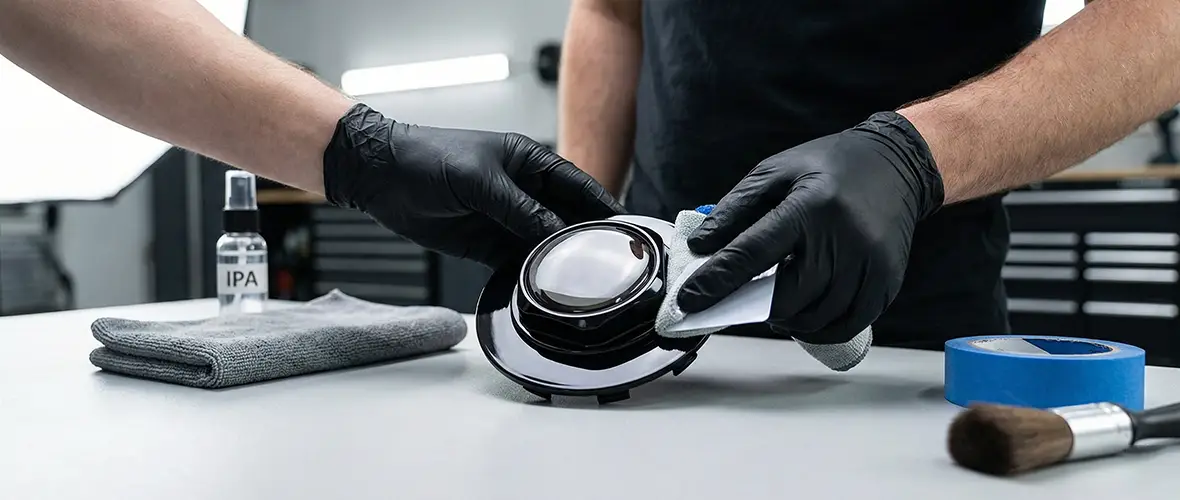
Step six: pressure is the job, especially at the edge
This is where the “never fall off” part is won. Adhesive needs pressure to wet out into the tiny texture of the surface, and the edge needs the most pressure because it takes the most abuse. A gentle tap does nothing, and a quick swipe does not seat the perimeter. Use this press pattern so you do not trap air and so you do not forget the edge.
Press the center firmly to lock the position
Work outward in slow circles
Press every part of the edge ring with strong, even force
Do one more slow lap around the edge, then stop
A plastic card wrapped in microfiber spreads force evenly without scratching. When you finish, the edge should look like it is painted on, with no light line at the perimeter. If you see a light line, that is a lift waiting to happen. Fix it now while everything is clean and warm.
Step seven: warm the edge and press again
Edges are where wheels live a hard life, water hits them first and airflow tries to pry them up. Heat plus pressure locks the edge down by helping the adhesive flow while you press. This is not a separate trick, it is finishing the job the right way. Warm the edge lightly, then press again while it is warm.
Warm the sticker and cap with a hair dryer on low, keep it moving
Focus on the edge ring for about fifteen seconds total
Press the edge again, one slow lap
If a corner still lifts after this, do not shove glue under it. A lift after heat and pressure means the surface was contaminated, or the sticker edge is landing on a bevel or heavy texture. Fix the cause, then redo it clean. A clean redo beats a glue patch every time.
Step eight: give it time before harsh cleaning
A sticker can feel stuck right away and still get stronger as it sits. Adhesive settles, and normal warmth cycles help it build grip. If you hit it immediately with wheel cleaner and a stiff brush, you stress the edge before it is ready. Use this cure rule and you avoid most early failures.
No wheel cleaner for 24 hours
No pressure washer aimed at the edge for 48 hours
Gentle soap wash is fine, no scrubbing on the edge
After that, clean normally, just do not attack the edge like it is dirt on a shovel. Treat it like a badge and it stays sealed. If you pressure wash, keep the nozzle back and spray across the face, not into the edge. A good wash habit keeps edges tight.
The fast checklist you can follow without thinking
If you want the short version you can keep on your phone, this is it. It is the same process, just stripped down to the moves that matter. Do it in this order and you stop guessing. Skip steps and you are back to gambling.
Remove the cap if possible
Wash with soap and water, scrub the edge groove
Rinse and dry twice
Wipe with isopropyl alcohol on a clean towel
Warm the cap until it feels warm
Use tape hinge alignment
Press center, then press the edge hard
Warm the edge and press again
Wait before harsh cleaning
Picking stickers that match wheel life
Sticker choice matters on wheels because heat, UV, and chemicals hit the surface every day. Domed emblems protect the print because the clear top layer acts like a shield, while flat decals stay slim for a subtle look. If you want a clean comparison, read Domed versus Flat Wheel Stickers. It explains when each style makes sense and why both still need a flat surface.
To browse by finish, start in Stickers and pick the visual style first. From there, narrow it to Wheel Emblems or Domed Emblems depending on the finish you want. Those category pages make it easier to shop once you already measured your cap. They also help you stay consistent if you are matching front and rear caps.
If you want the glossy badge look, Wheel Sticker Logo Epoxy Dome Edition is a solid example. It uses a vinyl base with a domed resin top layer designed for weather and road spray. The prep steps above are what make that dome stay locked down at the edge. Do the prep once and you will not have to chase corners later.
FAQ
Q: What is the best final wipe before I apply car decals on wheels?
A: Wash with soap and water first, then wipe with isopropyl alcohol on a clean towel and let it dry fully. That two step approach is standard in major graphic prep guidance.
Q: What temperature should I do wheel sticker installation at?
A: Work with the cap surface warm and within about 10°C to 32°C, and warm the cap if it is colder. That range matches common application guidance and gives the adhesive a fair shot.
Q: Why do hubcap stickers peel at the edge first?
A: The edge takes airflow, water spray, and scrubbing first. Edge lift almost always means oil contamination, cold surface, or the sticker edge landing on a bevel.
Q: Can I put a domed emblem on a textured center cap?
A: Do not do it, domed pieces need a flat surface because texture reduces contact and the edge turns into a bridge.
Q: How long should I wait before wheel cleaner or a pressure washer?
A: Wait at least 24 hours before wheel cleaner and avoid pressure washer spray aimed at the edge for 48 hours. That gives the adhesive time to settle and build grip.


