

How to Swap Center Caps Without Taking the Wheel Off
So, You Want New Caps. But You Hate Jacks.
I get it. You bought some fresh custom caps. They look great in the box. But now you’re staring at your car. And you’re thinking about the jack. And the lug wrench. And the sweat.
Taking a wheel off just to pop out a piece of plastic? That feels wrong. It takes an hour. It hurts your back. And honestly, it’s overkill. I’ve been wrenching on cars for twenty years. If I took the wheel off every time a customer wanted new emblems, I’d never get home for dinner.
There is a better way. Actually, there are three better ways. You can do this in the driveway. In five minutes. With stuff you already have.
You don't need a lift. You just need the right trick. And maybe a specific center cap removal tool.
Let’s save you some time. Keep the jack in the trunk. Here is how we do it in the shop when the boss isn't looking.
The Solution: What is a Center Cap Removal Tool?
A center cap removal tool isn't always a fancy gadget. Sometimes it is. Sometimes it’s just a clever use of physics.
Technically, it is any device that grabs the cap from the front. Most center caps are designed to be pushed out from the back. That’s why the "official" manual says to remove the wheel. They want you to poke it from the inside.
But we are going to pull from the outside. To do that, we need grip. Or leverage.
If you search for a center cap removal tool online, you might find a little suction cup. Or a plastic hook. These are cheap. They work well on smooth, plastic caps. But they aren't the only way. You can make your own center cap removal tool right now.
Why use a tool? Because the alternative is a flathead screwdriver. And that is a bad idea. A metal screwdriver against a metal rim equals a scratch. A deep one. Once you scratch that clear coat, it peels. Then it rots. Don't do it.
Use a proper center cap removal tool. It’s safer. It’s faster. And it looks cooler.
Why The Wheel-Off Method Stinks
- It takes 45 minutes minimum.
- You have to retorque your lug nuts.
- You get dirty.
- You risk dropping the wheel on your foot.
So let's skip all that.
The Deep Dive: How to Pull Them Out
We are going to look at three methods. One of them will work for your car. It depends on your caps. Are they smooth? Are they textured? Are they stuck tight?
Method 1: The Duct Tape Handle (The DIY Center Cap Removal Tool)
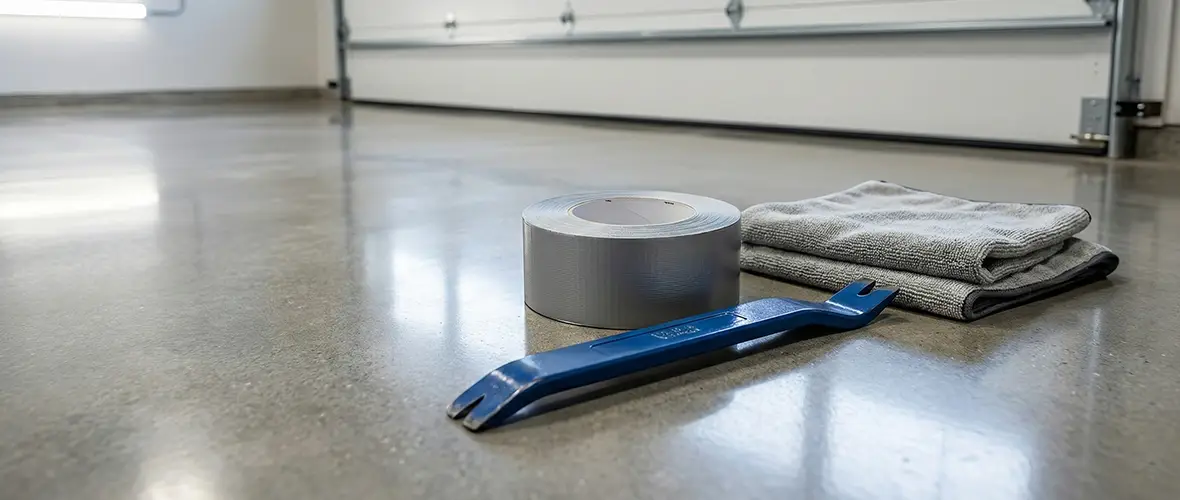
This is my favorite. It sounds stupid. But it works 90% of the time. You turn a strip of tape into a handle. It acts like a sticky center cap removal tool.
What you need:
- Strong duct tape or gaffer tape. (Cheap scotch tape won't work).
- Rubbing alcohol (to clean the cap).
- A rag.
The Steps:
First, clean the cap. This is crucial. If the cap is dusty, the tape won't stick. Use the alcohol. Wipe it dry. It needs to be squeaky clean.
Take a piece of tape. About six inches long. Stick the middle of the tape to the center of the cap. Rub it down hard. Use your thumbnail. You want zero air bubbles. The tape needs to become one with the plastic.
Now, take the two loose ends of the tape. Fold them together. You have just made a handle. A little tape tab.
Here is the trick. Do not pull slowly. Slow pulling just peels the tape off. You need to snap it. Yank it quick. Like pulling a loose tooth.
Grab the tape handle. Brace your hand against the tire. Yank.
Pop. The cap should fly out. If it doesn't, try more tape. Or better tape. This homemade center cap removal tool is free and won't scratch your rims.
Method 2: The Suction Cup
This is the "official" method for many mechanics. A heavy-duty suction cup acts as a perfect center cap removal tool. You can buy these. Or you might have one in a phone repair kit.
Note: This only works on smooth caps. If your cap has a raised logo or 3D letters, the suction won't hold. The air will leak out.
How to do it:
- Clean the cap again. Wet the suction cup slightly. Just a lick.
- Press the cup firmly onto the dead center.
- Lock the handle if it has one.
- Pull straight back.
It requires a sharp tug. Sometimes the cap is baked on with brake dust. If the suction cup slides off, this center cap removal tool method won't work for you. Move to the next one.
Method 3: The Plastic Pry Tool (The Wedge)
This is the most aggressive method. You need a plastic trim removal tool. Not metal. Never metal. If you use metal, you will cry when you see the scratch.
You can buy a set of plastic pry tools cheap. They are wedges made of nylon. They are strong but softer than your wheel's paint.
The Steps:
Inspect the gap. Look closely at where the cap meets the wheel. Is there a tiny slot? Some Audi and VW wheels have a specific slot for a center cap removal tool hook.
If there is no slot, find the thinnest part of the gap. Slide the edge of your plastic tool in there. Wiggle it. You want to get under the lip.
Once it is in, pry gently. Work your way around. Don't just pry one side. The cap might tilt and jam. Pry a little at 12 o'clock. Then 6 o'clock. Then 3 o'clock. Walk it out.
This plastic wedge is a very effective center cap removal tool. It gives you leverage. Just be patient. Old plastic gets brittle. If you pry too hard, the clip on the back of the cap might snap. But hey, you are replacing them anyway, right?
Method 4: The Coat Hanger Hook
Got a wire coat hanger? You have a center cap removal tool. Cut a piece of wire. Bend a tiny hook at the end. Like a letter J. The hook should be very short. Maybe 3mm.
Slide the wire into the gap or through a lug nut hole if your cap covers the lugs. Hook the back of the cap. Pull. This requires some finesse. You are fishing for the edge. But it works on stubborn caps where tape fails.
Installation: The Easy Part
Once the old ones are out, you are ready to upgrade. Maybe you bought some custom ones from Center Wheel Emblems. This is the fun part.
Clean the hole in the wheel. Use a rag. Get the brake dust out. The new cap needs a clean seat.
Line up the new cap. Look at the back. There is usually a notch for the valve stem or a specific alignment pin. Make sure it lines up.
Do not hit it with a hammer. Please.
Use the heel of your hand. Give it a firm pop. It should click. If it doesn't click, don't force it. Check the alignment. If you smash it, you will break the tabs. Then you need a new one. And you will be sad.
For those of you just adding a sticker to the existing cap, check out Step-by-Step: Installing Hubcap Stickers Like a Pro for tips on surface prep. The adhesive needs a clean surface or it will fly off on the highway.
Common Mistakes People Make
I see bad things happen to good wheels. Don't be that guy. Here is what goes wrong when you don't use a proper center cap removal tool.
Using a Metal Screwdriver
I said it before. I will say it again. Metal on metal is bad. You think you will be careful. You won't be. The screwdriver slips. It gouges the aluminum. Now you have a permanent scar on your $400 rim. Use plastic. Or tape.
Forcing It When It's Frozen
Brake dust is like glue. It gets hot and sticky. Sometimes the cap is fused to the wheel. If you pull too hard with your center cap removal tool, you might break the cap leaving the clips inside. Then you have to take the wheel off anyway to push the broken bits out. If it won't budge, spray a little soapy water in the gap. Let it soak.
Wrong Size Tool
If you use a suction cup that is bigger than the cap, it won't seal. It will hit the rim. It needs to be smaller than the cap. Size matters here.
Forgetting to Clean
The tape method fails if the cap is dirty. The tape just grabs the dirt and slides off. You think the method sucks. But really, your wheel was just dirty. Clean it first.
Breaking the Tabs
Plastic gets brittle in the sun. If your car is ten years old, those clips are dry. When you pull, they might snap. This isn't the fault of the center cap removal tool. It’s just old plastic. Be prepared to buy new caps if you take the old ones out. Don't expect to reuse them if they are ancient.
FAQ Section
Q: Can I use a knife as a center cap removal tool?
No. Put the knife away. You will cut the tire, scratch the rim, or cut yourself. A knife tip is brittle. It can snap off in your eye. Use plastic tools or the tape method. It isn't worth the risk.
Q: Will this work on floating center caps?
Usually, yes. Floating caps (like on some Rolls Royces or aftermarket spinners) still mount the same way. But be careful. The mechanism inside is delicate. Don't pull on the spinning part. Pull on the edge. A suction cup center cap removal tool is best here to avoid jamming the bearing.
Q: What if the cap falls inside the wheel?
It shouldn't. The cap pushes out from the inside, so you are pulling it "off". It can't really fall "in" unless you smash it through. If you push it in by accident? Yeah, you have to take the wheel off. Sorry.
Q: My new caps are loose. What do I do?
Sometimes aftermarket caps are a tiny bit small. You can wrap a single layer of electrical tape around the tabs on the back. This makes them fit tighter. It’s a classic mechanic trick. Just don't use too much tape or they won't clip in.
Get It Done
Stop looking at those old, faded caps. You know they look bad. Swapping them is one of the cheapest upgrades you can do.
You don't need a mechanic. You don't need a lift. You just need five minutes and a roll of duct tape. Or a cheap plastic center cap removal tool.
Your wheels make the car. The center cap is the finishing touch. If you need new ones, look at the options at Center Wheel Emblems. Get the right size. Get the right look. And get them on your car today.
Driving with missing or ugly caps is like wearing a tuxedo with dirty sneakers. Fix it. It’s easy.