

Restoring Vintage Rims. Can You Sticker Over Corrosion?
Last week I had a set of vintage rims on the bench with center caps that looked like they had been left in sea air. If you are asking, “Restoring Vintage Rims. Can You Sticker Over Corrosion?”, here is the honest answer: you can refresh the look with a sticker, but you cannot skip the corrosion. Rim restoration only works when the surface underneath the sticker is clean, solid, and sealed, otherwise the adhesive bonds to powder and peeling clear coat, not to the cap.
Vintage wheels have a special problem. They usually have years of brake dust baked in, road salt pitting, and tiny curb nicks that cracked the clear coat a long time ago. Once moisture gets under that coating, oxidation creeps and the finish goes cloudy or bubbly.
If your goal is to restore old center caps and make the wheels look sharp again, treat the sticker as the last step, not the first. This guide shows how to fix corroded wheel center caps the realistic way, and then how to apply a wheel emblem so it stays put for the long run.
What “corrosion” actually means on rims and center caps
Corrosion on wheels is not always the same thing, and that matters because each type needs a different fix.
Here are the three common looks you will see on vintage rims and caps:
White chalky haze or crust on aluminum parts
That is aluminum oxide and it forms as aluminum reacts with oxygen and moisture. The oxide layer can be thin and protective, but when the finish is damaged, you get rough oxidation that keeps spreading and looks messy.Bubbling, peeling, or milky clear coat
This is where the coating failed and trapped contamination and moisture underneath. Once clear coat starts lifting, it usually keeps lifting.Pitting
Pitting looks like tiny craters. It is often linked to road salts, moisture, and harsh chemicals that attack weak points in the coating. If it gets bad, it can even contribute to slow leaks at the bead area or around damaged sections.
A sticker will not “bridge” those problems. It will mirror them. Every bump, every crater, every flake of loose clear coat will print through, and the edges will start lifting the first time you wash the car hard.
The simple rule for sticker bonding on wheels
A wheel emblem bonds like tape. It needs direct contact with a stable surface, plus pressure, plus time.
That means the surface must be:
• Flat enough to make full contact
• Clean and grease free
• Dry, including in pores and pits
• Sealed, meaning no chalky oxidation that rubs off on your finger
For most clean bonding jobs, 3M recommends cleaning many substrates with a 50:50 mix of isopropyl alcohol and water before applying adhesive products. That is a great baseline for wheel center caps too, because it cuts light oils and leaves minimal residue. 3M+1
If you wipe your cap and the cloth comes away gray and dusty, you are not done. That dust is exactly what will kill adhesion.
Quick decision: should you restore, replace, or cover
This is the part people skip, and it is why their “quick fix” becomes a redo.
Use this fast checklist on one wheel and one center cap first:
Rub test
If white powder comes off on your finger, you have active oxidation. Clean and remove it before any sticker goes on.Edge test
If you can catch a fingernail under peeling clear coat, it will keep lifting under a sticker. Strip or sand back to a stable edge.Depth test
If pits are deep enough that you can feel them clearly, decide if you are willing to sand and level them. A domed sticker can hide very light texture, but deep pitting will still telegraph.Safety test
If corrosion is on the bead seat area, the lug seats, or there are cracks or bends, stop. Cosmetic rim restoration is not the priority. Get a pro to assess the wheel.
Most of the time, center caps are the perfect place to start. They are small, cheap compared to wheels, and the work teaches you the exact prep level you need before you touch the rims themselves.
Remove the center cap without causing more damage
I see this mistake constantly: someone pries the cap with a screwdriver, scratches the finish, and then wonders why corrosion spreads from that scratch months later.
If you want the cleanest restoration, pull the cap safely. A suction cup method and other non metal techniques are covered in this guide: How to Swap Center Caps Without Taking the Wheel Off. It is faster than fighting a screwdriver, and it avoids new clear coat damage that can lead to more oxidation.
Once the cap is off, do your work on a bench. Better lighting, better control, less frustration.
Step by step: restore a corroded wheel center cap the right way
This is the method I use when a customer wants the cap to look factory clean again before a new emblem goes on.
Step 1. Deep clean first, not last
Start by removing grime and brake dust so you do not grind it into the surface.
Rinse with water
Wash with a mild car shampoo or a dedicated wheel cleaner that is safe for the cap material
Use a soft brush around edges and lettering
Rinse again and dry fully
Drying matters more than people think. Water trapped around edges or inside tiny pits can ruin your next steps.
Step 2. Strip loose clear coat and loose corrosion
You are not trying to make it perfect yet. You are trying to remove anything unstable.
• If the clear coat is flaking, sand until you reach a solid edge
• If there is white oxidation, you need to remove it, not smear it
A practical approach for oxidation removal on aluminum surfaces often combines cleaning, controlled abrasion, and finishing steps, depending on how severe the oxidation is.
For most caps, wet sanding is the cleanest way to control dust and keep scratches uniform.
A typical sanding progression looks like this:
Start around 400 grit wet sanding for oxidation and light pitting
Move to finer grits to refine the surface
Finish with polish if you are going for a bare metal look, or prep for paint if you are refinishing
Do not rush this. Your sticker will only look as good as the surface under it.
Step 3. Decide on your finish: paint and clear, or polish and seal
You have two realistic paths.
Option 1: Paint and clear
This is usually best for painted caps, black caps, and anything with color.
• Prime if needed
• Paint in light coats
• Clear coat to seal it
Option 2: Polish and seal
This is for bare aluminum looks, but it is higher maintenance. If you leave bare metal unsealed, oxidation comes back.
Whichever path you choose, the goal is the same: lock down the surface so it is smooth and stable.
Step 4. Final surface prep for the sticker
This is where most “peel in a week” installs happen. They skip this, touch the surface with oily fingers, then apply.
Do it like this:
Let the finish cure fully
If you just painted or cleared, give it time according to the product instructions. Soft paint under an emblem can shift.Clean with a 50:50 isopropyl alcohol and water mix
Wipe with a lint free cloth, then let it flash dry.Do a final no touch rule
Once it is clean, do not touch the bonding area with your fingertips.
Can you sticker over corrosion on the rim itself
Sometimes you are not just restoring the cap. You are looking at the wheel face and thinking, “Maybe a big emblem or decal will hide this.”
Here is the truth.
You can cover small cosmetic flaws, but you cannot cover active corrosion. If there is bubbling, flaking, or chalky oxidation, you have to stop the reaction first. Pitting linked to winter salt and chemical exposure is one of the big reasons wheel finishes fail over time. Customise Your Wheels+1
If the wheel has only light texture and the area you are sticking to is flat, a high quality emblem can be a smart finishing touch. But the rim still needs a stable, sealed surface for the adhesive to grab.
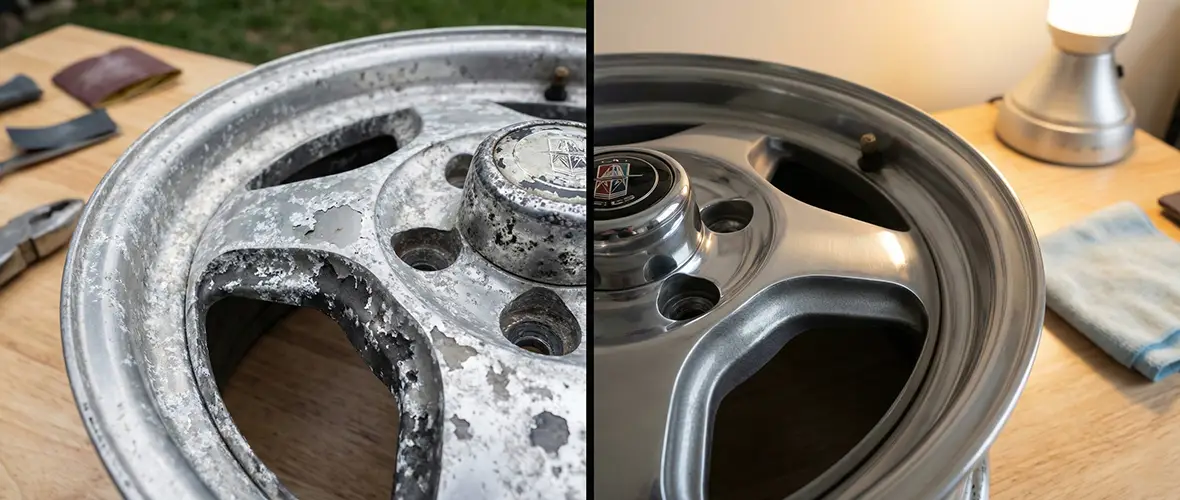
Like you see above, the difference is not magic. It is prep. The sticker is just the clean final layer that makes the restoration look finished.
Which sticker style hides imperfections better
If you are doing rim restoration and you want the emblem to visually “reset” the center, this is where product choice matters.
Two options on our store are made for this job:
If you want to compare finishes across brands and sizes, start in the main Stickers section and filter from there.
Wheel Emblems
These are designed for the flat logo area on a center cap. They are the cleanest look when the cap surface is already smooth.Domed Emblems
A domed emblem gives you a raised, glossy finish that can visually mask very minor texture underneath. It still needs a clean, sealed surface, but it can be more forgiving on small sanding marks. hubcapstickers.com+1
If your cap is truly rough or actively oxidizing, do not treat a domed emblem like body filler. It is not. It is a premium finish layer.
A realistic “weekend plan” that actually works
If you want a plan that fits real life, here is how I would break it down.
Day 1: Diagnose and prep
Pull one cap safely
Clean it, sand it, stabilize the finish
Decide paint and clear, or polish and seal
Day 2: Finish and apply
Let the finish cure enough to handle
Final IPA and water wipe
Apply the emblem with firm pressure
Leave it alone for the rest of the day so the adhesive can build bond
That last part is not negotiable. Adhesives develop strength with pressure and dwell time. If you slap it on and immediately blast the wheels with water, you are testing the edge before it has a chance to settle.
Common mistakes that ruin a restoration
These are the pitfalls I see most often when someone tries to fix corroded wheel center caps quickly.
Skipping the rub test
If oxidation dust is still coming off, you are bonding to dust.Applying over peeling clear coat
The sticker does not fix peeling, it just peels with it.Using harsh chemicals without checking material
Some strong acids and aggressive cleaners can etch aluminum and make the finish worse. Use products intended for wheel and aluminum cleaning, and follow directions.Touching the surface after cleaning
Finger oils are enough to cause edge lift over time.Centering by eyeballing from one angle
Always look straight down at the cap and rotate it. The eye lies when you stand at an angle.
What if you cannot get the corrosion perfect
This is where I want you to be practical.
If the wheel is a true vintage rim with character, perfection is not always the goal. The goal is stable, clean, and intentional.
A slightly imperfect cap that is sealed and then finished with a crisp emblem looks dramatically better than a flaky cap with original graphics fading away. If you have seen factory emblems peel and fade after years of sun and washing, you already know how much the wheel look depends on that tiny center detail.
Quick Q&A
Q: Can I put a wheel emblem directly on top of white oxidation?
No. Oxidation dust is not a stable surface. Remove it, seal the cap, then apply.
Q: What is the best cleaner right before I apply the sticker?
A 50:50 mix of isopropyl alcohol and water is a solid baseline for surface prep, as long as the surface is already clean and dry.
Q: Will a domed emblem hide pitting on vintage rims?
It can hide very light texture, but deep pitting still shows. The real fix is leveling and sealing the surface first.
Q: Do I need to remove the center cap to do this right?
It helps a lot because you can clean and sand evenly on a bench. If you want safe removal methods, follow How to Swap Center Caps Without Taking the Wheel Off.
Q: What is the fastest way to make restored wheels look finished?
Once the cap is stable and sealed, adding a crisp emblem from Wheel Emblems is the quickest high impact visual upgrade.